Yogurt is a highly nutritious and popular fermented food but it is even better if you could make your own yogurt at home with a longer fermentation period of 24 to 48 hours. If you’re new to yogurt-making, it might seem intimidating, but fear not! The process is actually simpler than pan-frying a steak! This post shows you how to make 24-hour yogurt that is super rich in beneficial bacteria. It also includes answers to the most frequently asked questions regarding yogurt making.
Why Should You Make 24-Hour Yogurt?
There are several reasons why making your own 24-hour yogurt is beneficial:
- Abundance of friendly bacteria: The extended fermentation period in 24-hour yogurt results in a higher concentration of beneficial bacteria compared to commercially available yogurt
- Reduced lactose content: Thanks to the prolonged fermentation, 24-hour yogurt contains minimal lactose, as the bacteria consume most of the milk sugar during this process, converting it into lactic acid. As a result, some people may be able to tolerate this yogurt even though they are intolerant to milk
- Nutrient-rich: Similar to milk, yogurt is packed with essential nutrients such as protein, vitamin B12, vitamin B2, calcium, and phosphorus
- Promotes gut healing: 24 hour yogurt has a large quantity of beneficial bacteria. Consuming it can help populate the gut with friendly bacteria, improve its diversity and facilitate the healing of the gut.
Moreover, making yogurt at home allows you to create the best quality yogurt possible using premium milk at a fraction of the cost of store-bought yogurt. By making it yourself, you can also avoid any additives or preservatives that are often present in commercially produced yogurt.
24-hour yogurt recipe
Ingredients
- 1 quart (4 cups) of whole milk of your choice
- 2 tablespoons of good quality plain yogurt
- 3/4 cup of milk powder for thicker yogurt (optional).
Note: If you use goat’s milk, sheep’s milk or raw cow’s milk, the yogurt will be a lot thinner than using pasteurized cow’s milk. If you don’t mind runny yogurt, this is fine. But if you prefer thicker yogurt, adding milk powder (use goat, sheep or cow milk powder respectively depending on the type of milk you are using) is recommended.
Instructions
- Pour the whole milk into a heavy-bottomed pot and heat it over medium to low heat. Stir occasionally to prevent scorching and ensure even heating. Heat the milk until it reaches a temperature of about 110°F (43°C). Using a thermometer can help you monitor the temperature accurately. This step is crucial to create an ideal environment for the yogurt cultures to thrive.
- Add the yogurt starter and milk powder (if used) to the warm milk and mix well until the yogurt and milk powder are thoroughly incorporated and evenly distributed.
- If using an yogurt maker, pour the milk into glass jars and set the temperature to 100° F (38°C) and the time to 24 hours.
- If using an oven, turn the oven on the lowest setting to warm it up to 100°F-104°F (38°C–40°C). Check the oven temperature with a thermometer first before placing the glass jars in and turn the oven light on. (After making countless batches of yogurt, I can just tell by touching the oven if the temperature is right or not and I’m sure you can do the same. If you have to guess without using a thermometer, the oven should feel warm to the touch, similar to the sensation when touching your child’s forehead when they have a fever).
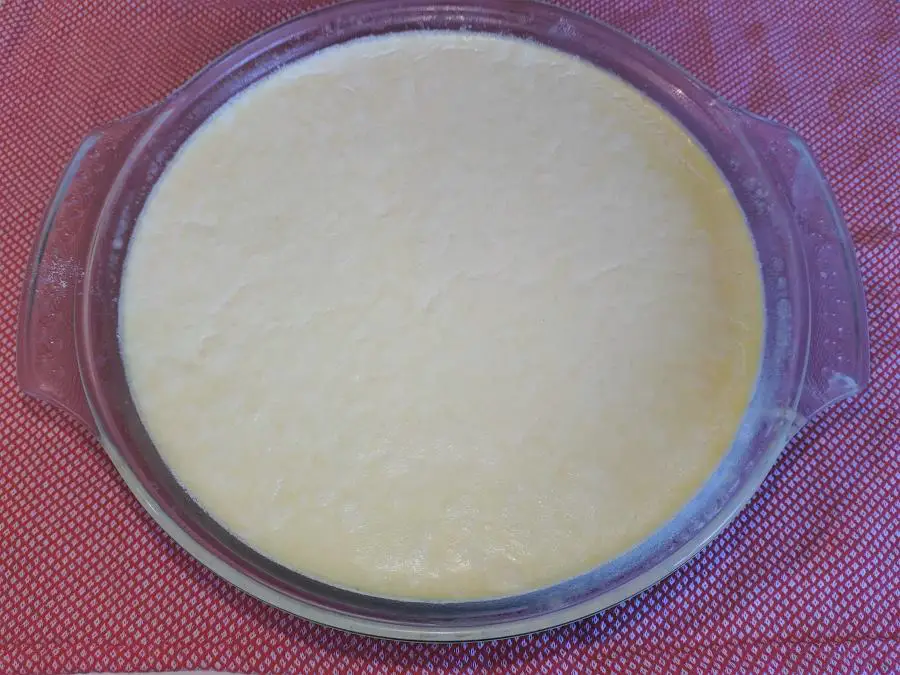
- Let the yogurt sit undisturbed for a minimum of 24 hours, allowing the live cultures to ferment and develop. After 24 hours, check the yogurt’s consistency. It should be thickened and have a tangy taste. If it’s not as thick as you prefer, you can continue incubating for a few more hours until you reach the desired consistency. The longer it ferments, the tangier and thicker the yogurt will become. You can ferment it for up to 48 hours, depending on your taste preference.
- Once the fermentation has finished, remove the jars from the oven. The yogurt will likely appear thinner than commercial yogurt at this stage. If you use whole milk (aka full cream milk), there will be a layer of cream on top of the yogurt jars and this is perfectly fine. If you would like the cream to be evenly distributed, whisk the yogurt before chilling
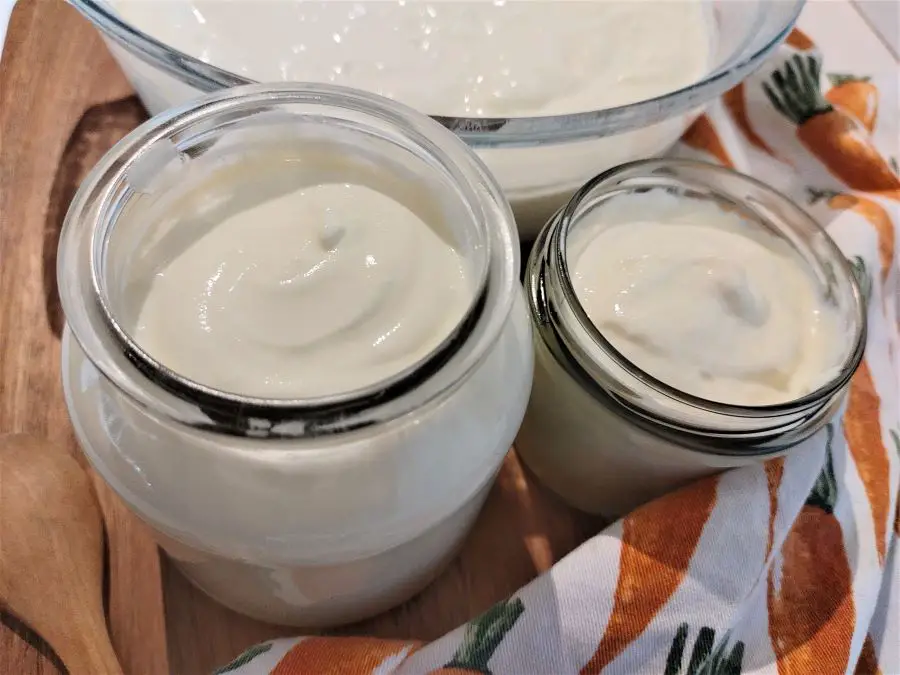
- Transfer the jars to the refrigerator and chill for at least 4 hours or overnight. The yogurt will thicken as it cools.
If your family eat a lot of yogurt, you can double or triple the recipe to save time (but please do try a few small batches first). Yogurt can last for at least a couple of weeks in the fridge so making large batches is perfectly fine.
I usually make three quarts each time using the oven because my family does eat a lot of yogurt. You can add the toppings you like such as chopped fruits or honey. This homemade yogurt is much healthier than the flavored yogurt available in stores which often contains things like thickeners (modified corn or tapioca starch or gelatin), sugar, reconstituted fruit, flavorings, colors, acidity regulators, and stabilizers.
If you make a large batch, transfer the yogurt to a few glass jars or small airtight containers so it can remain fresh for longer.
Frequently asked questions
Do I need to pre-heat the milk to 180°F (82°C)?
The answer is you don’t have to, but if you prefer yogurt with a thicker consistency, it is recommended.
In the above recipe, I only heat the milk to 110°F (43°C) and then add the yogurt starter.
I used to heat the milk to 180°F (82°C) and then let it cool to 110°F (43°C), but I have found that it is unnecessary and the yogurt still turns out perfectly every time.
There are several reasons why people heat the milk to 180°F when making yogurt:
- Pasteurization: Heating the milk helps kill potentially harmful bacteria. However, most milk sold in grocery stores is already pasteurized, so this step is unnecessary.
- Denaturation of proteins: Heating the milk causes the proteins to denature, resulting in a thicker texture in the final yogurt. If you prefer thicker yogurt, you may choose to pre-heat the milk. Alternatively, adding a bit of milk powder can help thicken the yogurt. Whole milk also produces thicker yogurt compared to skim or fat-free milk.
- Enzyme deactivation: Heating the milk deactivates certain enzymes that could interfere with the fermentation process or affect the texture and flavor of the yogurt. However, in my experience, I haven’t found this to be necessary.
What is the best milk to make yogurt?
The best milk to make yogurt is raw milk. If raw milk is unavailable, pasteurized and unhomogenized milk is a good alternative. This type of milk has undergone minimal processing, typically heated to about 63°C for 30 minutes or 72°C for 15 seconds.
What is the best yogurt starter?
I always use plain Greek yogurt as a starter. I would use my own home-made yogurt as a starter for a couple of times after that but would buy a tub of Greek yogurt to start over again afterwards.
If you buy plain yogurt from stores to use as a starter, make sure it has only two ingredients: milk and live cultures.
You can also use freeze-dried starter cultures and probiotic capsules which I find can be useful when you need to travel because you can make yogurt from milk powder and dried cultures or probiotic capsules.
Why is my yogurt watery?
If you find that your yogurt is still watery after fermenting the milk for 24 hours, there are several possible reasons for this:
- Poor quality starter: If the starter you used has a low concentration of bacteria (e.g. starter that contains thickeners and additives), it may not be sufficient to properly ferment the milk and create a thick consistency
- Skim milk, goat’s milk, or sheep’s milk: These types of milk generally produce yogurt with a thinner consistency compared to whole cow’s milk. The higher fat content in whole milk contributes to a thicker texture
- Lack of pre-heating: Pre-heating the milk before adding the starter can help denature the proteins and create a thicker texture in the final yogurt. If you skip this step, the yogurt may turn out more watery. Pre-heating the milk to around 180°F (82°C) and then cooling it to the desired fermentation temperature can help improve the consistency
- Not using milk powder: Adding milk powder to the milk can help increase the solids content and thicken the yogurt. If you omit the milk powder, the yogurt may end up being more watery
- Incorrect temperature setting: Maintaining the correct temperature during the fermentation process is crucial for achieving the desired consistency. If the temperature is too high or too low, it can affect the fermentation process and result in watery yogurt. Make sure to follow the recommended temperature settings and monitor them closely.
How can I thicken my yogurt?
If you prefer thicker yogurt, there are several things you can do to achieve this:
- Use whole milk instead of skim milk: Whole milk contains a higher fat content, which contributes to a thicker and creamier texture in yogurt
- Heat the milk for longer: When heating the milk, you can extend the heating time to denature the milk proteins further. This denaturation helps create a thicker texture in the yogurt. However, be cautious not to overheat the milk, as it can ruin the yogurt as well
- Add milk powder or gelatin: Adding milk powder or gelatin to the milk before the fermentation process can help increase the solids content and thicken the yogurt. Milk powder contains additional proteins, while gelatin provides a thickening effect.
Why does my yogurt separate?
If your yogurt separates into water and solid, it is most likely because the temperate is too high. You still can eat it (best to use in smoothies) but it may taste different from your normal yogurt.
Can I make yogurt from milk powder?
Yes, you can definitely make yogurt from milk powder. Follow the instructions on the package to prepare the milk using lukewarm water, then proceed to make yogurt as shown above.
How long does the yogurt last in the fridge?
The recommended storage time for homemade yogurt is 1-2 weeks. In my experience, I have found that my homemade yogurt remains fresh for up to two weeks in the refrigerator.
Other posts you might be interested in:
How to Make Your Own Homemade Laundry Detergent
How to Make Your Own Multi-Purpose Cream from Tallow
Pure and Natural Homemade Deodorant for Carnivores
Homemade Toothpaste for Carnivores
What Is the Best Meat to Eat on the Carnivore Diet?
What Are the Best Ways to Cook Meat on the Carnivore Diet?
Best Sources of Vitamin C on the Carnivore Diet
Disclaimer: The information in this post is for reference purposes only and is not intended to constitute or replace professional medical advice. Please consult a qualified medical professional before making any changes to your diet or lifestyle. Please check out our disclaimer for more detail.