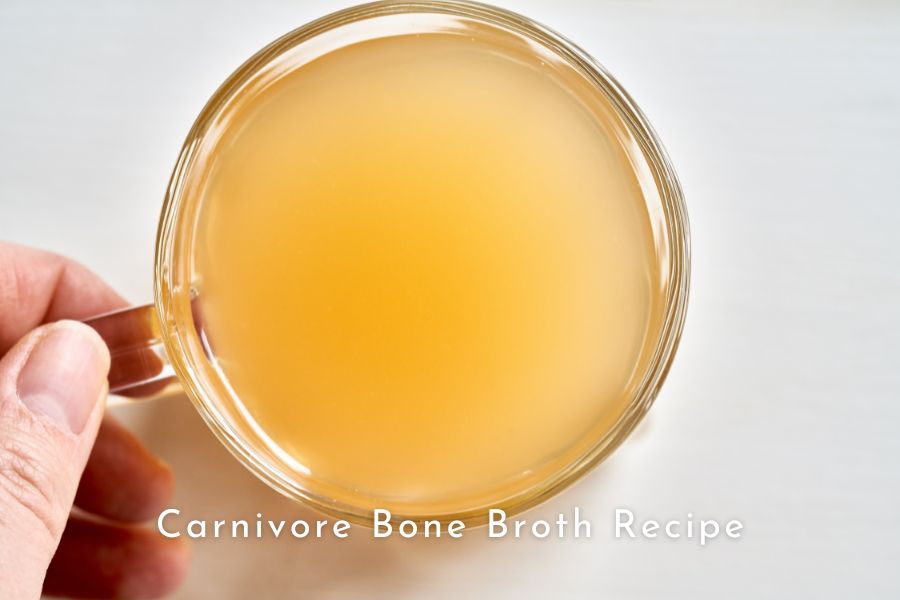
Bone broth is something that everyone, whether they are on the carnivore diet or not, should know how to make because it is so simple to make and super nutritious. Here is a very easy carnivore bone broth recipe for you to get started right away.
This recipe will make about 4 liters of broth. However, you can reduce the amount of water to make it denser or dilute it further by adding more water, depending upon your taste.
Total active prep time is about 30 minutes.
The cooking time is 8 hours to 48 hours. You can start drinking a very light broth after about 3 hours of cooking but the longer, the better. I usually do about 24 hours but I sometimes let it simmer for days to get soft edible bones for calcium. More on this later on.
Ingredients
For a pure carnivore bone broth, you only need bones, salt and water.
- 2 kg or 4.4 pounds of bones
- For beef, lamb, veal, bison bone broth. Any bones will do, but it’s good to get a mixture of shank, neck, knuckle and marrow bones, and oxtails.
- For pork bone broth. As above, it’s good to get a mixture and if you like it to have extra gelatin, use pig trotters.
- For chicken bone broth. Use any bones, chicken carcasses, necks, feet, wings, and any leftover bones from your meals. If you can get chicken cheaply, using the whole chicken will give your broth a denser flavor.
- For a mixed bone broth. Use any kind of bones you like (e.g. beef, lamb, pork, turkey and chicken).
- 2 tsp salt
- Salt is optional. Some people on the carnivore diet prefer no salt at all because animal source foods already have some sodium. Bones with some meat on will give you a bit of sodium and potassium.
- However, for beginners who have just transitioned from a standard diet to a carnivore diet, a bit of salt would make it taste better (I personally find that I use less and less salt as I become more adapted to this way of eating).
- Pink Himalayan salt is probably better than table salt which often contains anti-caking agents.
- If you want to add salt, two teaspoons are generally enough but you can always adjust the amount of salt to suit your taste.
- 4 liters of Water
- Enough to cover the bones.
- The general bone-to-water ratio is 1:2 for the finishing product. For example, in this recipe, 2 kg of bones give 4 liters of bone broth. I usually just add a bit more water to allow for evaporation loss. Of course, you can adjust the water quantity to make it denser or lighter to suit your taste.
Vinegar is optional. The aim of the vinegar is to leach out minerals but, apparently, someone got it lab-tested and found no difference in mineral contents of the broth with or without vinegar. Add about 2 tablespoons of apple cider vinegar if desired.
Instructions
- Preheat oven to 450oF (230oC). Place the bones in a deep roasting dish, sprinkle a bit of salt if desired and roast them for 30 to 40 minutes. Turn over halfway through so the bones are roasted evenly. Caramelized brown bones are what you are after. You can skip this step if you are using the leftover bones from your meals.
- Transfer the roasted bones and any juices to a large pot. Add water plus optional vinegar if desired. Bring to a boil then reduce the heat to let it simmer on the lowest setting.
- Skim the foam that rises to the top every 15 minutes or so during the first two hours of cooking. This will give you a clear bone broth rather than a cloudy one. Let it simmer for the rest of the cooking time.
- Once finished, let it cool slightly then strain the broth using a fine-mesh sieve. Alternatively, you can wrap the bones in cheesecloth before simmering and just lift the whole thing out when it’s done.
- Skim off the fat, salt to taste and store in glass jars. They can last for about a week in the fridge and up to six months in the freezer.
- If you prefer a very low-fat version, leave it in the fridge overnight and remove the solid layer of fat on top (you can save the fat for cooking later). However, by now the broth would have become a very thick gel. Reheat slightly to make it easier for storing in glass jars.
Tips and troubleshooting

Reasons why your bone broth doesn’t gel
The three most likely reasons why your bone broth doesn’t gel are:
- You haven’t cooked them for long enough. If 8 hours of simmering doesn’t give you the thick gel broth you’re after, next time do it for 12 hours to 24 hours. If you are short on time, invest in an instant pot or a pressure cooker. As with the watery bone broth you already have, just heat it a bit more to reduce the water content.
- Your bone-to-water ratio is not right. As mentioned above, the general ratio is 1:2, but if for whatever reason that doesn’t work for you, you can always increase the ratio to get a thicker gel.
- The bones you use don’t have many connective tissues (e.g. piped bones). Beef tendons, pig trotters, and chicken feet will definitely do the trick. However, I’ve never had any issue with gelling, no matter what kind of bones I use.
How to deal with stink while cooking bone broth?
- Keep the kitchen fan on. You will find that not many people like the smell coming out of a pot of bones simmering on the stove for a day or two. Please keep the fan on while it’s cooking if you don’t want your house to stink for days.
- Roast first. Get smaller cuts or increase the roasting time to make sure they are well caramelised and cooked through.
- Try with different kinds of bones. Pork and chicken bones don’t seem to stink as much as lamb and beef bones.
- Add some vegetables. Even if you are on the carnivore diet, if you can tolerate vegetables, it’s perfectly fine to add some vegetables for taste if that helps you to drink bone broth regularly.
- For the above recipe, add 6 carrots, 2 brown onions, 4 celery sticks, 2 leeks and 2 garlic heads (loosely chopped). If you like herbs, add 2 tsp dried oregano, 2 tsp dried parsley, 2 tsp dried thyme, and 4 bay leaves.
- About one hour before the planned finishing time, add the vegetables and herbs, bring to a boil then reduce heat to simmer. The vegetables will improve the flavor substantially but they don’t need a lot of cooking time. If you simmer the vegetables for too long, the bone broth will have more of a sweeter vegetable taste rather than a genuine bone broth taste.
- Leave it in the fridge overnight before drinking. While the broth might smell a bit when being cooked, it still tastes great after you leave it in the fridge overnight.
Why your bone broth tastes bland
Bone broth may taste bland to you if you’ve never had it before and expected it to taste amazing given all the health benefits you’ve heard about it.
There are a few things you can do:
- Roast for a bit longer. If the bones are well caramelized, the flavor will improve.
- Check how much salt you’ve put in your broth and see if a bit of extra salt may help.
- Taste again and see if it’s truly bland or it’s the oily taste that you’re not familiar with. If it is the latter, try to remove all the fat as per the instructions above.
- Increase bone to water ratio to get a thicker broth, it will improve the taste.
- Give yourself more time. Bone broth can be an acquired taste for some.
- Drink it at the beginning of your meal.
- Wait until you are truly hungry, I guarantee your bone broth will taste amazing.
- If the above still doesn’t work, fast for a few days and break your fast with a cup of bone broth, it will taste magical.
Do you always have to roast the bones first?
You don’t have to roast the bones first and can still enjoy the amazing benefits of your homemade broth. Raw bones will give you white broth, roasted bones will give you brown broth. The only two things roasting do are enhance the flavor a bit and give the broth a darker color.
I’ve tried to make both versions and there is a subtle difference in taste. The roasted bones give a slightly better flavor but if I’m short on time, I wouldn’t bother with roasting. If you want to save time, try both ways and see how the non-roasted version taste. If it’s fine with you, don’t bother with roasting next time.
My guess is that when you’ve just begun to transition from the standard American diet to the carnivore diet, your taste buds are still accustomed to the amazing flavors of junk foods which is a result of a perfect combination of salt, fat, sugar, and artificial flavorings. Hence, the non-roasted version is likely to taste very bland to you.
However, after you’ve been on the carnivore diet for a while, you may find that food is just a source of sustenance rather than entertainment and you wouldn’t mind drinking the raw-bones-straight-into-the-pot broth you make.
Do you have to skim the foam off?
People call it impurity but the foam rising to the top is just protein and fat.
Skimming off the foam will give you a clear broth that looks more appealing.
If you don’t mind drinking the cloudy bone broth, save yourself some time and don’t worry about skimming.
What is the ideal simmering time?
The answer is as long as you can make it. As a general guide:
- fish broth: 2 to 3 hours
- chicken bone broth: 8 to 12 hours.
- beef, lamb, veal, bison, pork bone broth: 12 to 24 hours.
If you want to save the bones to eat the marrow and the bones for a bit of calcium, you might need to simmer for even longer, especially if the bones are from aged animals.
What is the ideal heat?
There is no ideal heat, you can make bone broth both at high and low heat.
High heat will fasten the process but you will need to set the timer to top up water regularly. Low heat (e.g. using a slow cooker) will take time but you can pretty much set it up and forget about it till it’s done.
I always let it simmer on the lowest heat setting. The only reason I do this is it reduces the chance of the bones running dry, leaving you with blackened bones on the bottom of the pot and a smoky house.
What kind of bones is the best?
It’d be good if you can get bones from grass-fed or pasture-raised animals. However, it is not essential, any bones from butchers, small grocery stores, supermarkets or farmers’ markets will do. Your body will still thank you for it, no matter what kind of bones you use.
Buy the best quality bones you can afford and don’t stress about the rest. The key thing is consistency: make it a part of your regular diet.
Will the fat become rancid due to prolonged cooking?
I can’t find any lab evidence that the fat become rancid when you make bone broth.
However, if you are concerned, you can either:
- skim the fat that rises to the top a few times during the simmering process, or
- chill the bone broth in the fridge for a few hours and remove the solid layer of fat on top before using it.
Can you make broth with fish bone?
Yes, definitely. Use heads, carcasses or any whole fish that you can get cheaply. Fish broth is not very common but just as healthy. In addition, it’s a good source of iodine that is very important for thyroid function.
Unlike ruminant bones or pork bones which take a lot longer, you can have a flavorsome fish broth after as little as one hour. But try 3 to 8 hours if you have time.
For a super gelatin broth, use chicken feet, pig trotters and oxtails
Gelatin has many health benefits including gut healing, better skin, bone, and joint health, and better sleep quality.[1, 2, 3, 4] If you would like to increase the gelatin content of your broth, get bones with a lot of connective tissues, or even make one with just chicken feet, pig trotters and oxtails.
Save the bones for calcium
If you can’t handle dairy products, don’t get calcium supplements, they are costly and research has shown that they may be bad for your health. [5]
A cheap and healthy alternative is right there in your bone broth. Just save the bones after you drain the broth and have a couple of pieces each day. They are a great source of calcium in a highly bio-available form.
Depending on the types of bones and the age of the animals, after 24 to 48 hours of cooking, they are likely to be very soft and chewable. Break the large bones apart and eat the marrow too.
If you’ve done a large batch, put the bones in a few small bags and store them in the freezer to eat gradually.
Have a bone bag in your freezer
A bone bag in your freezer is a great way to reduce waste. Throw in all the leftover bones from your meals (bones from short ribs, lamb chops, pork chops, chicken drumsticks, chicken wings etc.) and when you have enough, make a pot of bone broth.
This will save you a little bit of money but the more important thing here is to honor the sacrifice of the animals we eat and not let anything go to waste.
Best video on bone broth
This is a very informative and entertaining video on bone broth by Dr Kaayla Daniel titled “Bone Broth and Health: A Look at the Science”. It is forty-five minutes long but I guarantee you it’ll be worth your time. She has convinced me to make bone broth become part of my daily staple.
How to use bone broth to improve your health
Here are some potential ways that you can use bone broth to improve your health.
- Daily consumption for general health. Bone broth is a true superfood, it is full of nutrients including collagen, gelatin, glycine, glycosaminoglycans, glutamine, proline and minerals. It would be good if you can incorporate it into your daily meal. Have a small cup with every meal or drink it separately whenever you like.
- Nursing the sick. When you feel a bit unwell for whatever reason, you usually don’t have much appetite and don’t want to eat much. This is natural because your body is focusing on fighting whatever makes you sick and relying on energy reserves to function. Though bone broth can’t truly resurrect the dead, it is a very nourishing drink to have during this time.
- Fighting fatigue. Chicken essence, a kind of broth that is made with both the bones and the meat using the double-boiling method, is found to be effective for recovering from mental fatigue. [6] It is widely used in Asian culture and usually reserved for the sick, children, the elderly, and new mothers.
- Gut healing. Consuming bone broth is one of the things you can do to heal your gut naturally because glutamine, found in bone broth, plays an important role in maintaining the integrity of the intestinal barrier. [7]
- Improving bone and joint health. Collagen in bone broth will support your bone and joint health because it is the main protein found in bones, tendons, and ligaments. [8] If the bones you use have a lot of connective tissues (tendons, ligaments, and cartilage), the broth will have a lot of glycosaminoglycans which are materials that your body needs for bone and joint formation.
- Beautiful skin, hair, and nail. Collagen gives skin smoothness and elasticity but as you get older, your collagen production declines. Rich in collagen, bone broth can potentially support your skin, hair, and nail health. [9]
- Better sleep quality. Glycine, an inhibitory neurotransmitter, found in bone broth can potentially help improve sleep quality. [10]
- Breaking a fast. Bone broth is also a good drink to gently end a long fast after days without any solid food. If you follow the carnivore diet, the above would be a perfect recipe. I especially like to drink the very light broth that you can get after about three hours of simmering to end a fast.
- Bone broth fast. If you find a prolonged water fast is too hard, a bone broth fast may turn out to be more manageable. While your calorie intake will be reduced substantially, you still get a small amount of essential nutrients, fat, protein, and electrolytes from the broth you drink.
- Use in other recipes. You can use bone broth instead of water or sauce to improve flavor in other dishes such as scrambled eggs, stewed or braised meat, soups, or pate.
Disclaimer: The information in this post is for reference purposes only and not intended to constitute or replace professional medical advice. Please consult a qualified medical professional before making any changes to your diet or lifestyle.